I accidentally deleted important photos from my Canon camera SD card before backing them up, and now I really need to recover them. The pictures include personal memories and a few images I need for work, so I’m looking for the best way to restore deleted Canon camera photos from an SD card without causing more data loss.
I’ve pulled deleted shots off Canon SD cards before, and the first move is boring but important. Stop using the card right now. No test pic. No short clip. Don’t poke around in the camera any more than needed. If the camera or your computer asks to format it, ignore that. On most Canon setups, deleting a photo removes the index entry first. The image data often stays put until new files land on top of it.
Take the card out of the camera. If it’s a full-size SD card, check the tiny switch on the side and slide it to the lock position. This does not recover anything by itself. It cuts down the odds of an accidental write, which is what matters.
Next, plug the card into a computer with a card reader. I’d skip connecting the Canon body over USB for recovery work. A reader usually gives software cleaner access to the card. Also, don’t write anything back to the SD card. Don’t run CHKDSK on Windows, and don’t use First Aid on Mac before recovery. Those tools try to repair the file system. They are not built for deleted photo rescue, and I’ve seen them make a mess of cases like this.
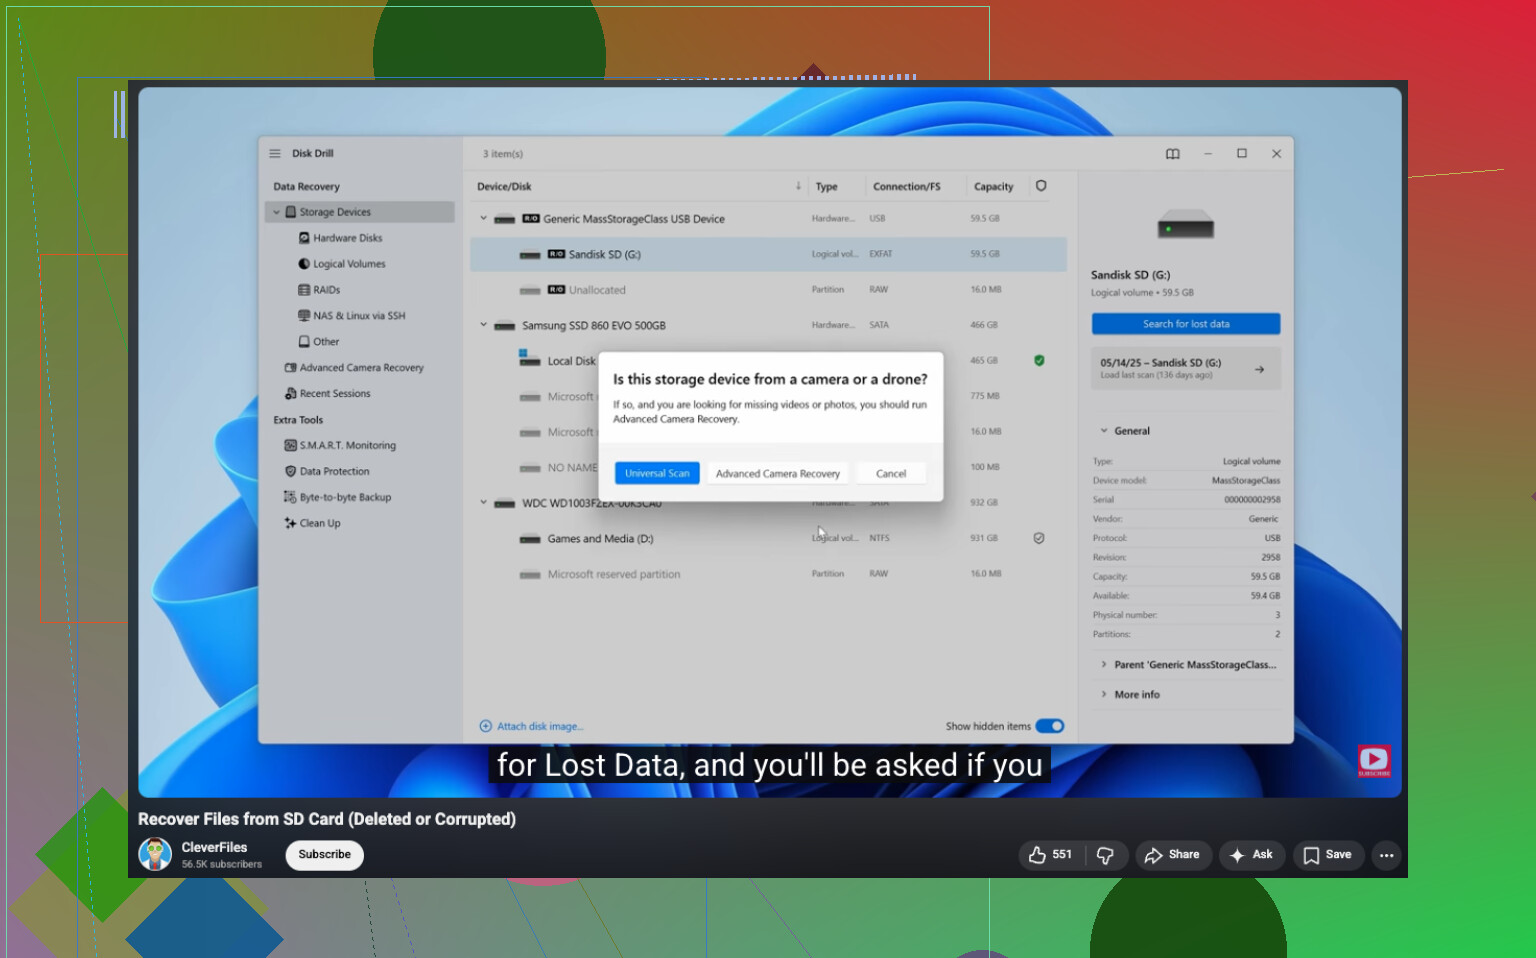
For recovery, use file recovery software. Disk Drill is one option I’d look at for a Canon card because it reads common photo formats, including RAW, and it shows previews before recovery. Preview matters more than people think. If a file opens in preview, your odds are better. If all you see is a pile of random filenames, you’re guessing.
Here’s the usual flow:
- Install the recovery app on your computer, never on the SD card.
- Insert the Canon SD card with a card reader.
- Pick the SD card inside the recovery software.
- Run a full or universal scan.
- Open the deleted or lost files section.
- Filter for photos and RAW formats.
- Preview what you find.
- Recover the files to your computer or another external drive, not back onto the same card.
Before you treat the card like your last shot, check the obvious places people forget. If you copied the images to a computer earlier, look in Recycle Bin on Windows or Trash on Mac. Also check backups and sync services if you had any turned on, like File History, Time Machine, Google Drive, iCloud, OneDrive, or Canon’s image.canon. I’ve seen people think a shoot was gone, then find half of it sitting in a cloud folder they forgot existed.
Your odds are better when the delete happened recently and the card sat unused after. If you kept shooting on it, some photos might still come back, but others could be damaged or gone for good because new data wrote over them. So, short version, stop using the card, scan it, preview what looks good, and save recovered files somewhere else. If you get your pics back, I’d stop using that card for the rest of the day. Some cards pick the worst time to act up, and yeah, it sucks.
8 Likes
If the delete happened in-camera, your best shot is file carving, not file system repair. I agree with @mikeappsreviewer on avoiding writes to the card. I disagree a bit on one thing, though. I would make a byte-for-byte image of the SD card first if the photos matter for work. Scan the image, not the original card. If one recovery app glitches or your reader drops connection, you still have the source preserved.
Use a card reader. On Windows, tools like USB Image Tool or HDD Raw Copy help create an image. On Mac, Disk Utility or dd works if you know what you’re doing. Then run Disk Drill against the image file or the card itself. Deep scan tends to find more CR2, CR3, JPG, and MOV files from Canon media than a fast pass. Preview the hits. If previews fail, those files are often partial or overwritten.
One more thing people skip. Check whether your Canon wrote dual formats, JPG plus RAW. Sometimes the JPG is gone from the directory but the RAW still survives, or vice versa. Sort results by file type and size. Canon RAW files are usually much larger, so tiny recovered files are often junk.
If the card shows errors, stop trying random apps. Repeated reads on a failing SD card are how peple make it worse. At that point, clone first, recover second.
For a plain guide on recovering deleted files from a camera SD card, this vid is decent, watch this camera SD card photo recovery walkthrough.
One thing I’d add to what @mikeappsreviewer and @sternenwanderer said: check whether the card is actually showing as the expected capacity in your computer. If a 64GB card suddenly mounts as something weird or keeps disconnecting, don’t keep rescanning it for hours. That’s less a “deleted photo” problem and more a possible card failure problem.
I also wouldn’t obsess over running 5 different recovery apps back to back right away. People do that and end up wasting time sorting duplicate junk files. Pick one solid tool, scan, review previews carefully, recover the real files first, then experiment only if needed. For that, Disk Drill is a pretty reasonable place to start since it handles Canon JPG, CR2, CR3, and video formats decently and makes previewing easy.
Also, if these photos are for work, check whether your editor or DAM app imported thumbnails or cached previews. Lightroom, Bridge, even some Windows/macOS caches can sometimes give you at least small versions when full recovery fails. Not ideal, but better than nothing.
And if the card was deleted in-camera after a single shoot, recovered files may come back without original filenames or folders. That’s normal, not neccesarily a bad sign.
For anyone else reading, this is basically a helpful discussion on Canon SD card photo recovery.

I’d add one check the others only touched on indirectly: look at a few recovered files in a hex viewer or at least inspect metadata after recovery. If the EXIF dates, camera model, and dimensions look sane, you likely got real files. If everything is zero-byte, tiny, or missing metadata, that usually means partial overwrite or false positives from carving.
I slightly disagree with the idea that more scans always help. On a healthy card, fine, but on flaky media, repeated full scans can waste your recovery window. Clone once if possible, then work from that copy.
Since @sternenwanderer, @hoshikuzu, and @mikeappsreviewer already covered the core recovery flow, my extra advice is to separate your results into JPG, CR2/CR3, and video right away. Canon videos and RAWs are big, and if storage is tight you do not want to mix everything together and accidentally skip the important stuff.
Disk Drill is a solid option here.
Pros:
- easy previewing
- handles Canon RAW and common video formats
- simple enough if you are stressed and want fast triage
Cons:
- deep scans can return lots of duplicates
- filenames and folder structure may not come back
- if the card is physically failing, software alone may not save it
If previews look broken across multiple files, stop and consider a pro lab before doing more experiments. That’s the point where DIY can get expensive.